


How To Integrate WooCommerce Delivery & Pickup Date Time Plugin To Your Google Calendar?
 Share
Share 


You can add the order information to your Google calendar as an event when an order is placed and the process is automated. You don’t have to do anything except the settings. You can also give the opportunity to your customer to add his placed order information to his Google calendar also. But some of the settings are tricky. Let’s start the tricky part
1. Go to the link https://console.cloud.google.com/ and you have to sign in to your Gmail account by which your website is verified in the Google search console.
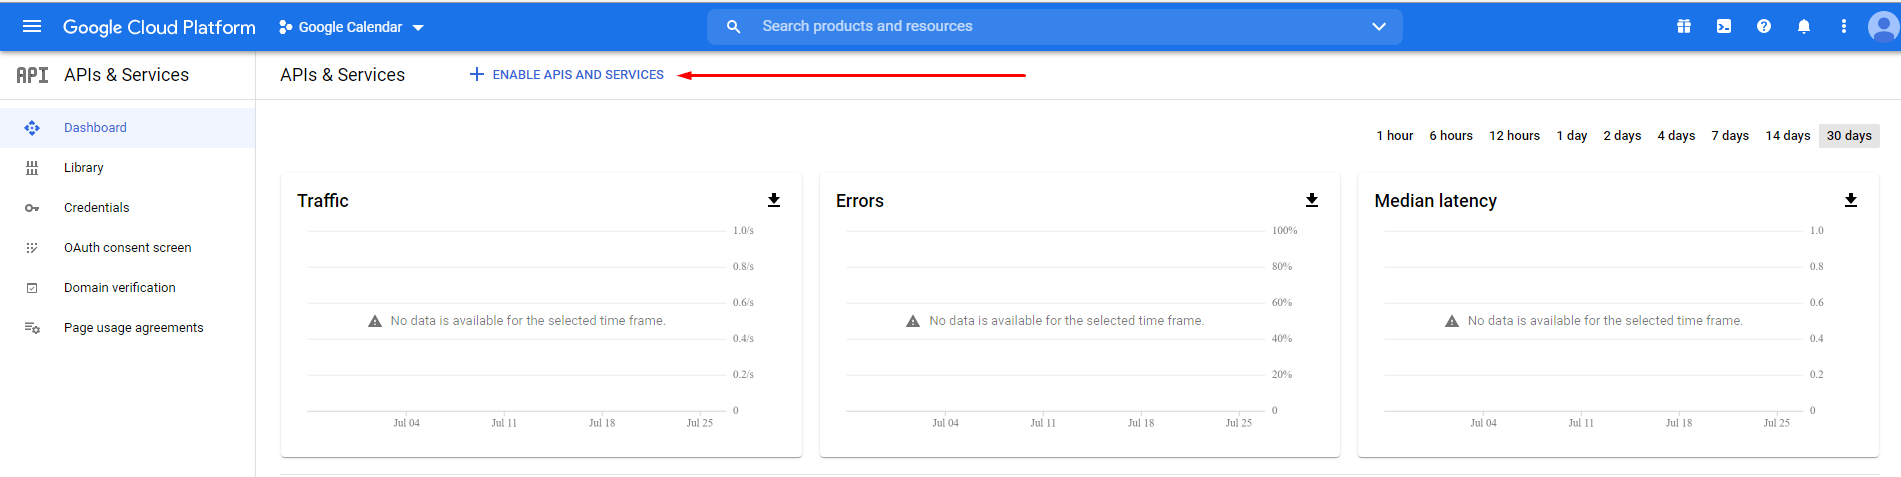
2. Go to APIs & Services > Dashboard from the left side menu
3. Click on Create Project button
4. Give the Project Name and click Create button
5. After creating the project, click on ENABLE APIS & SERVICES
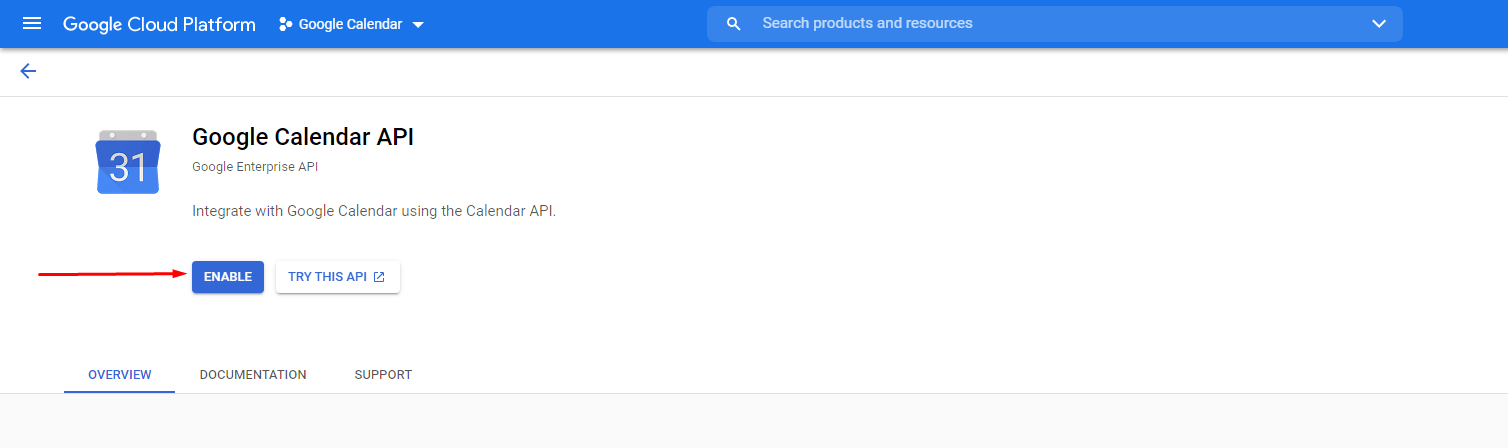
6. Search for Google Calendar API and click on Google Calendar API from the Search Result. For the second screen, click on ENABLE button.
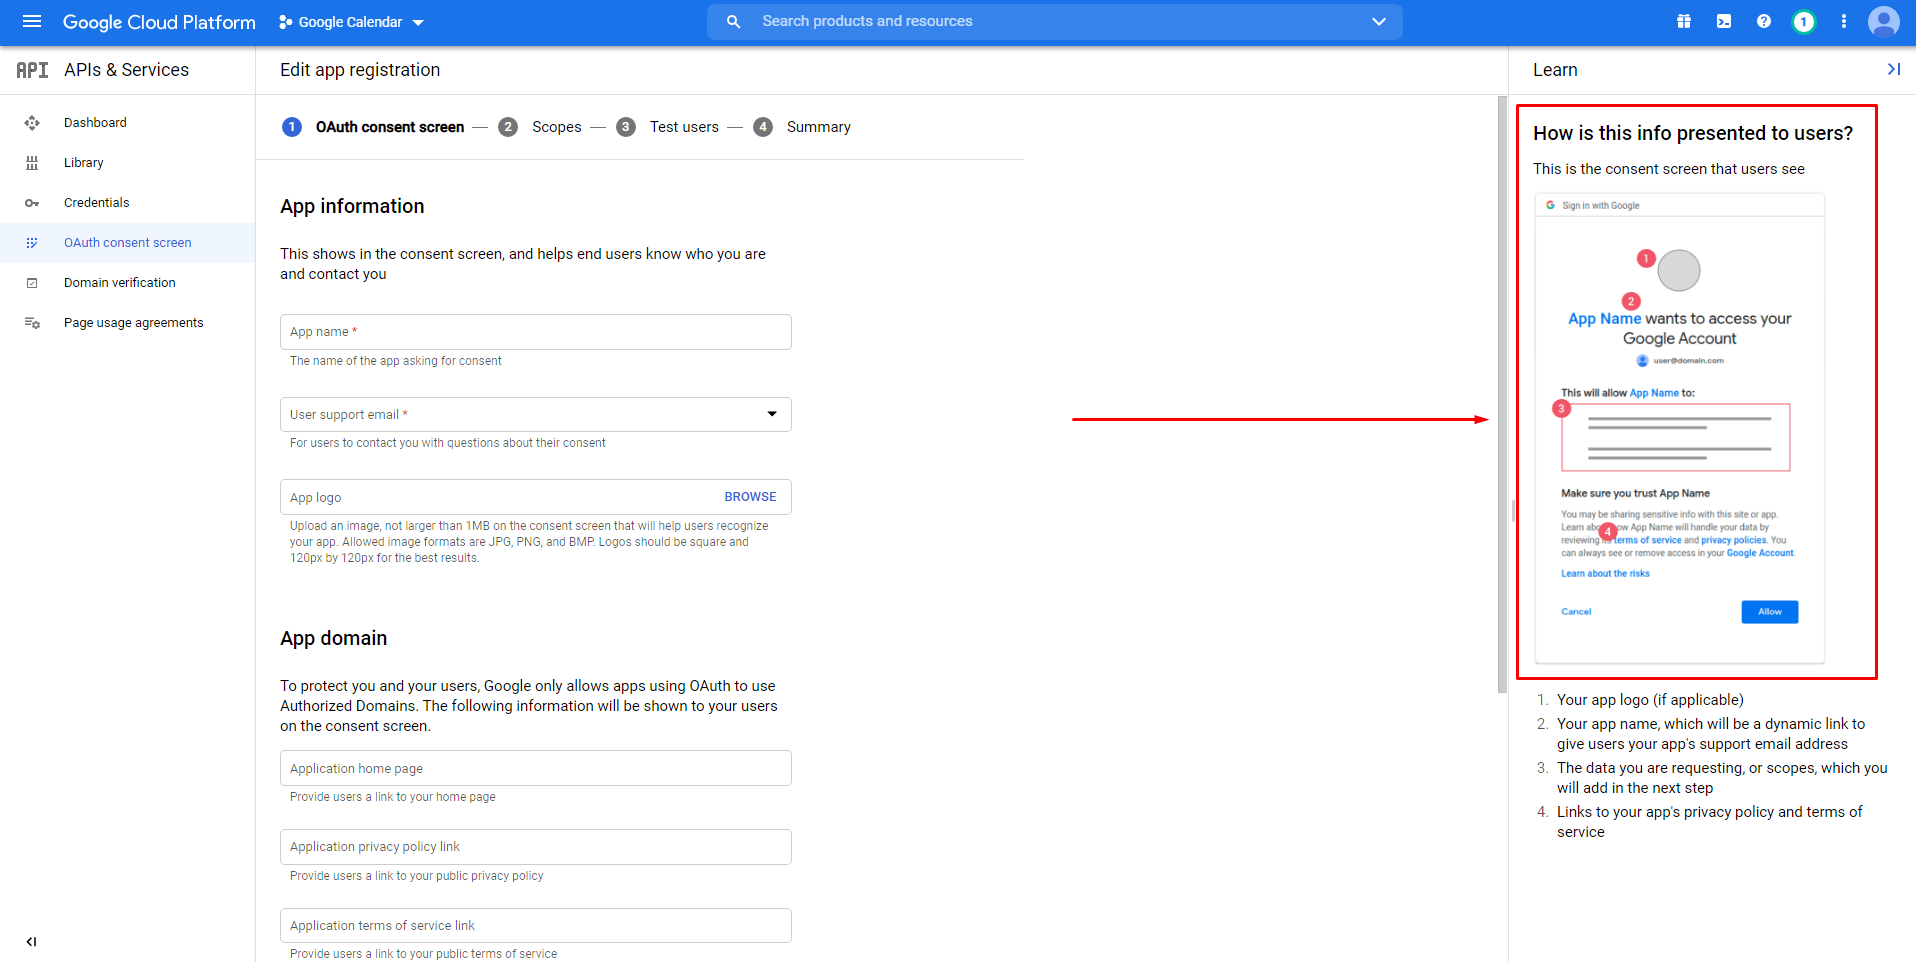
7. Click on the OAuth consent screen from the left menu and fill up the information on the screen. Please see the right side image to know how that information will show to your customers when he is going to add his order information to his Google calendar.
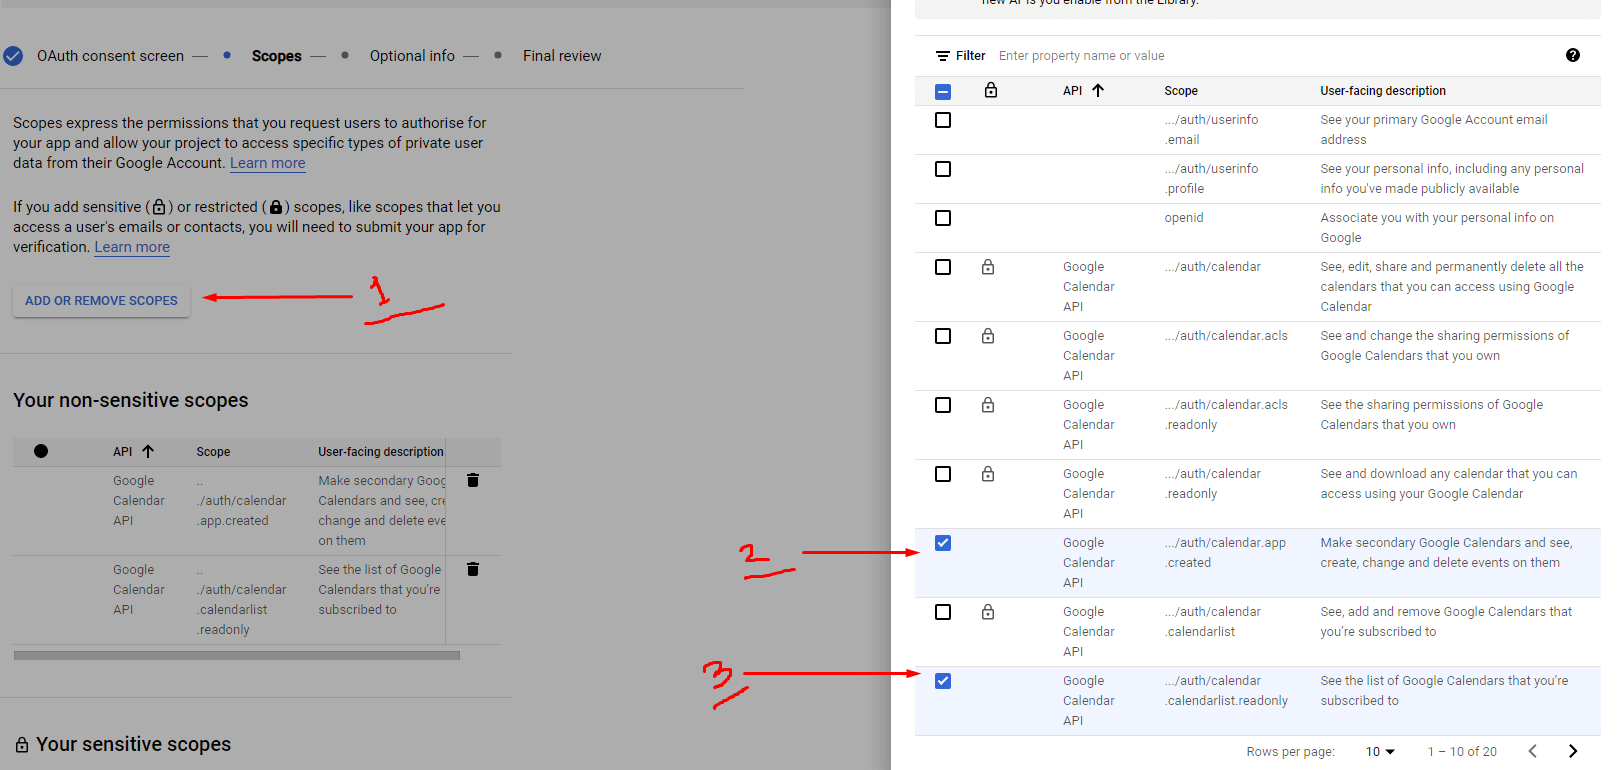
8. In the next step, from scope, you have to do exactly the following image
9. Click on the Credentials from the left menu again > from top Create credentials > OAuth Client ID. Select Web Application as Application Type. Give the Web application name and set 3 authorized redirect URLs as follows
=> your website url/wp-admin/admin.php?page=coderockz-woo-delivery-settings
=> your website url/wp-admin/edit.php?post_type=shop_order
=> your website checkout page url/order-received/
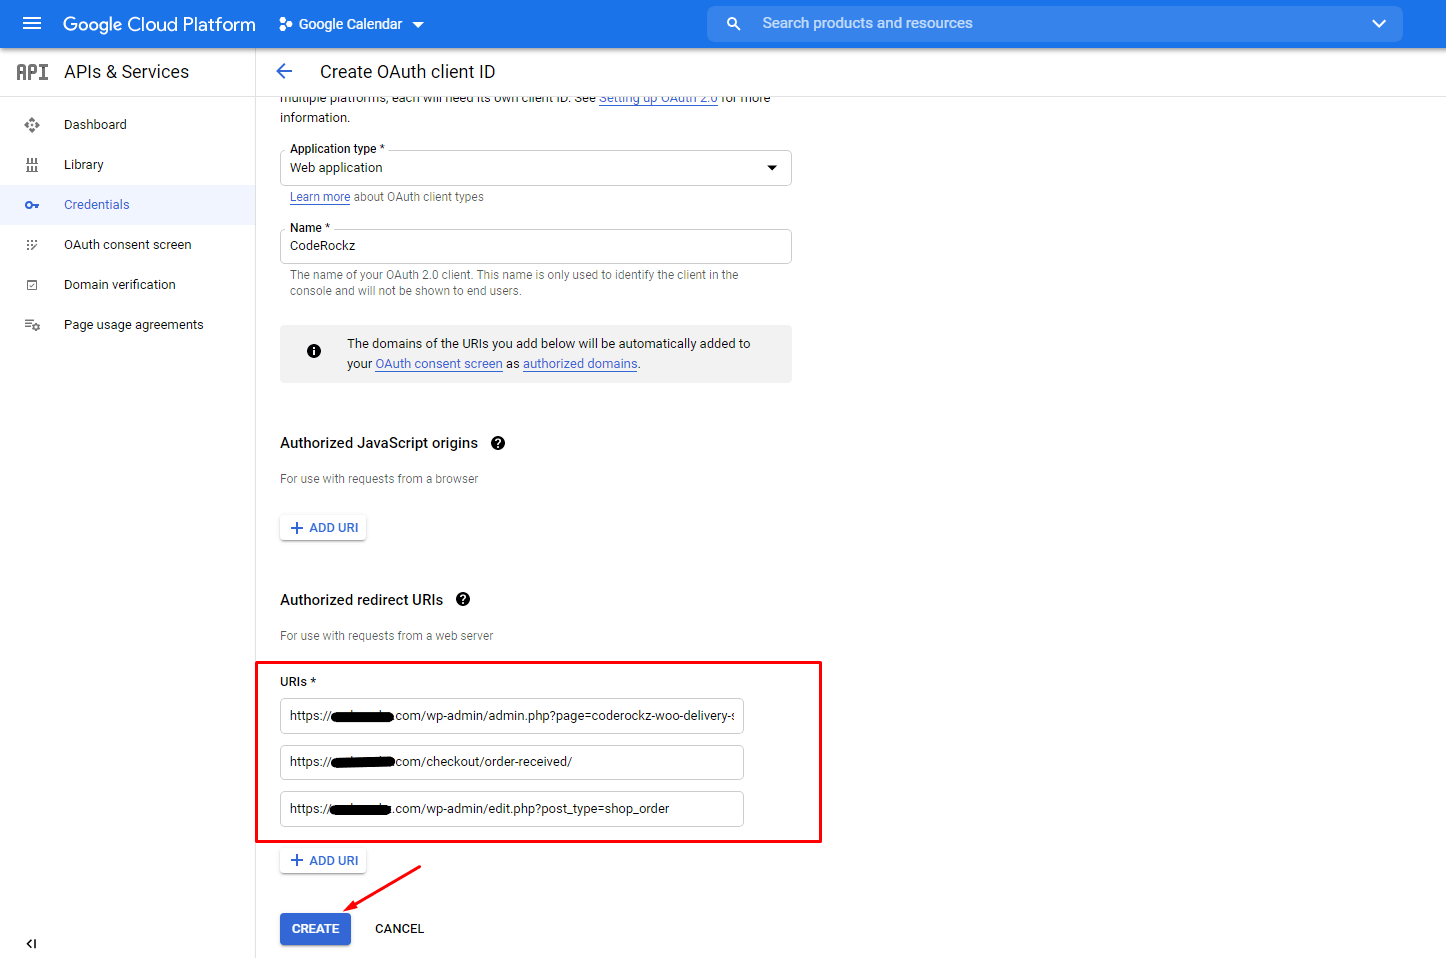
10. Click on Create button and you will see your Client ID and Client Secret on a popup.
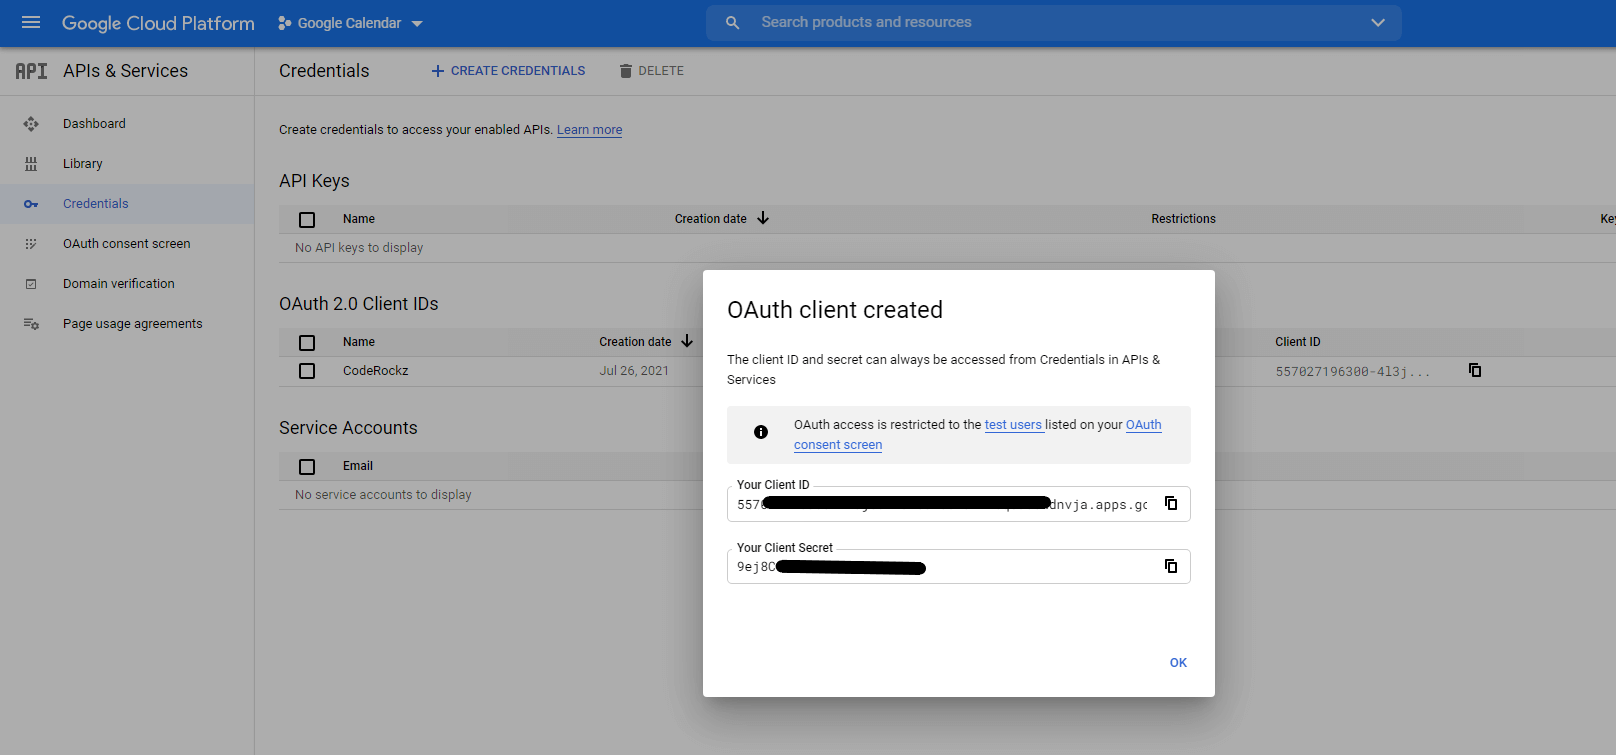
11. After getting the Client ID and Client Secret, put it on our plugin settings and enable the option Automatically Sync to Google Calendar or Google Calendar Sync Option for Customers or both
12. After clicking on the save changes button, you will see a button at the bottom to Authenticate in the same tab.

13. Click on the Authenticate button and you will see the OAuth consent screen. Maybe you will see the notice that the application is unsafe and the browser encourages you to cancel. But the application is made by you so you can give access to the application.
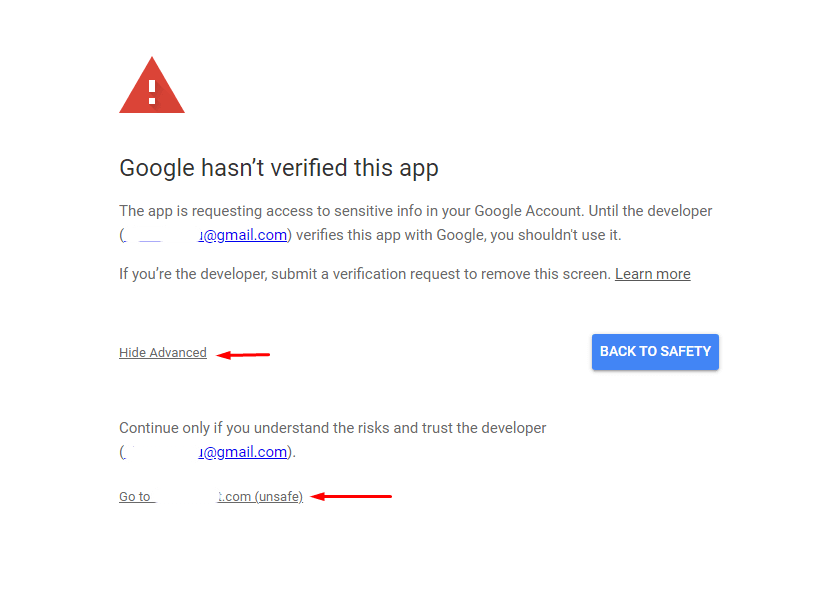
But if you want to make the application safe for the customers, you need to verify that from Google by submitting it otherwise the customers also see the unsafe notice from the browser and the customers may or maybe not proceed for their security purpose.
14. After granting access to your Google Calendar, you will see the authenticate button label is changed and showing you are authenticated.

Still Stuck? How can we help?
Updated on January 28, 2022